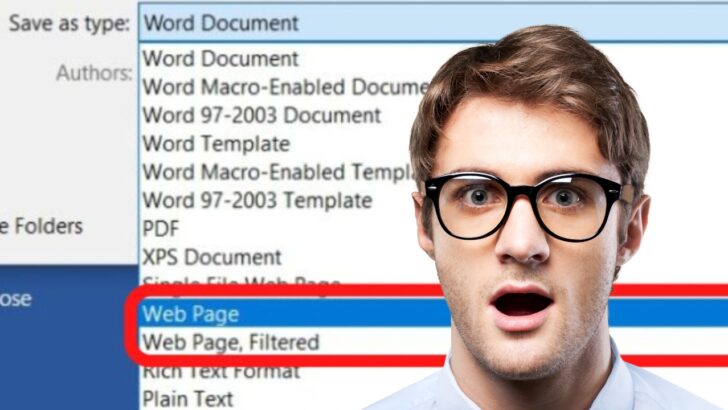
Saving a Word Document as HTML is seldom a good idea. Still though, if you need to, you can. MS Word gives you two options in the Save as menu.
Word documents are saved with the file extension *.docx. They cannot be uploaded direct to servers hosting websites, unless the file is converted to PDF or HTML.
If you use the Word app within Microsoft Office 365, there are more steps involved because you need to download the *.docx file and then convert that to an HTML document.
The file types you can use to save the HTML are Save As Webpage, and Save as > Webpage, Filtered.
To save a Word Document as HTML, select Save as and then save as a Webpage, Filtered file. This filters out some of the Office specific tags that are unnecessary outside of Microsoft Office products. Both HTML and XML codes are downloaded. Use a plain text or source code editor to edit the HTML.
Saving a Word Document as HTML Using Microsoft Office 365 Online
The only file type available to save documents using Microsoft 365 is the *.docx file type. To save the file as HTML, you will need to download the *.docx file and then convert the Word doc to HTML.
Follow these steps to download your file, then have it converted to HTML. If you are using the Word app on your system, you can skip ahead to step 6.
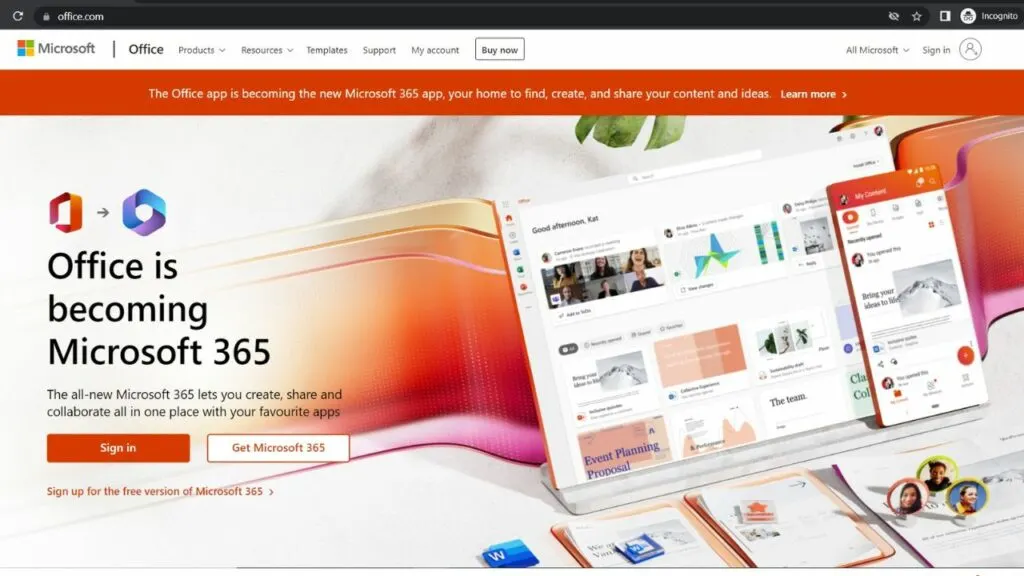
Step 1: Go to Office.com and sign in
Once signed in, you get access to the apps available in your Microsoft 365 account. Some apps are free to use, others require a premium subscription.
At the time of writing, the Microsoft Word app is free to use via the online service.
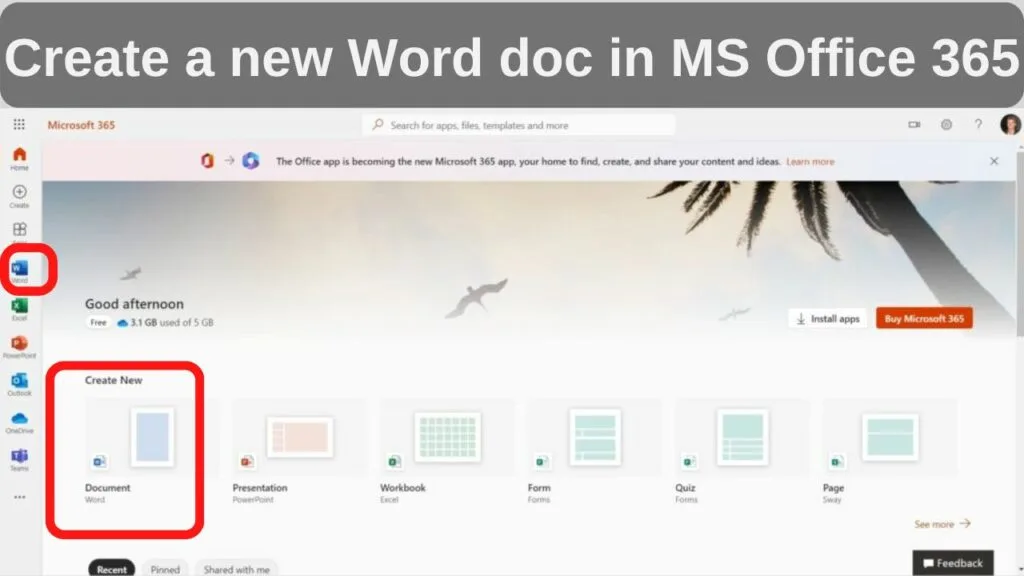
Step 2: Open a new document
Documents in Microsoft 365 are created with the Word app. You can access it by selecting the Word icon on the left navigation menu, or alternatively by clicking the Document tile.
Once a document is created, notice the name displayed on the tab. “Document.docx”.
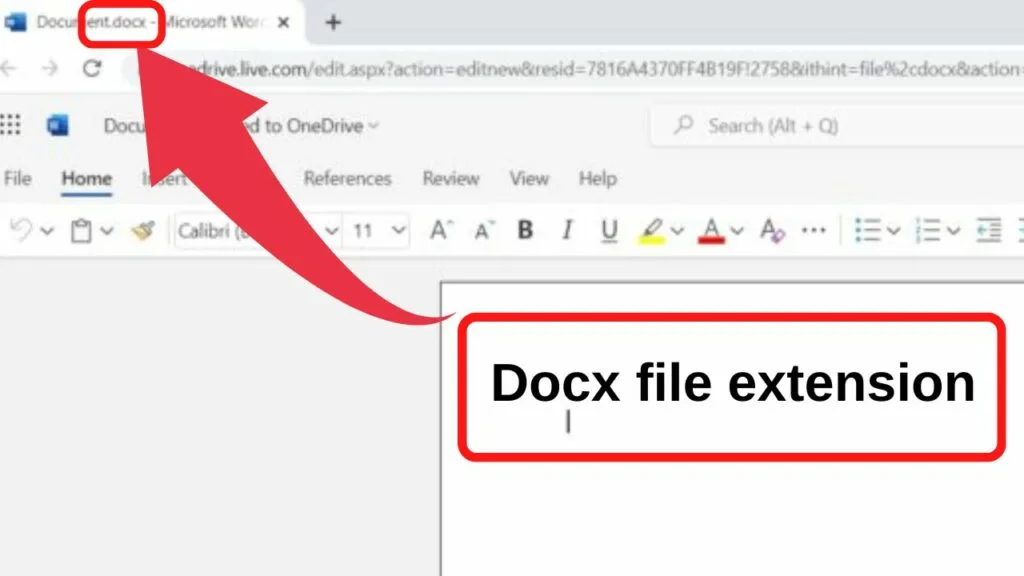
The Document name can be changed, but the file extension cannot be altered.
Step 3: Select “Save as” then download a copy
The Save as options within Word Online is not as extensive as the desktop version.
Word Online Save Options Explained:
- Save As is to create a *.docx file saved to OneDrive.
- “Rename this file” will only rename the document title. The file type cannot be changed.
- “Download a copy” does what you would expect. Downloads the file to your local drive. (as a *.docx file)
- Download as PDF will convert the Word doc to PDF.
- “Download as ODT” saves the file with the *.odt file extension. ODT stands for OpenDocument Text. MS Word can open these, as can open-source text editing programs such as Apache OpenOffice.
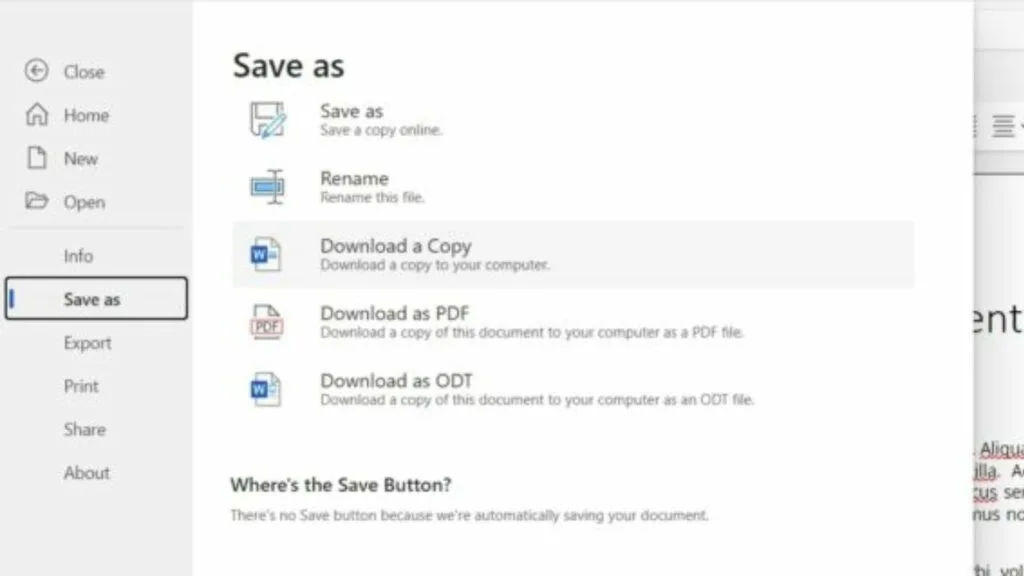
Depending on which text editing program you are using, choose the option that your system can open. ODT or DOCX.
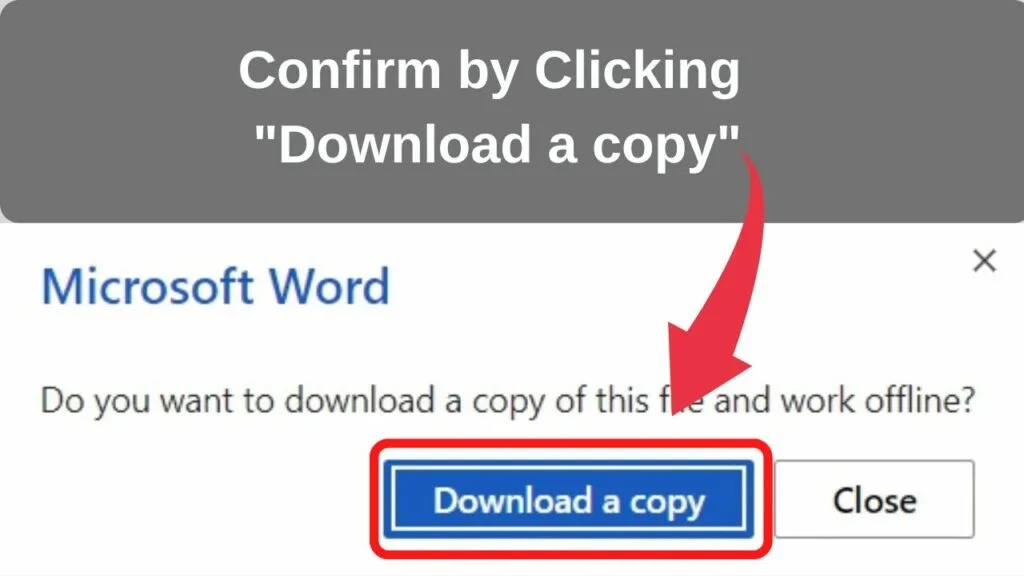
Selecting the “download a copy” will open a popup dialogue box asking you to confirm the download to save the file.
“Do you want to download a copy of this file and work offline?”
Click on the blue button that has “Download a copy”. Once the download is complete, it will show on the bottom left of your browser.
Step 4: Open your document in Word
If you have not already got the Word App on your computer, you will need to agree to accept the license agreement to use the app.
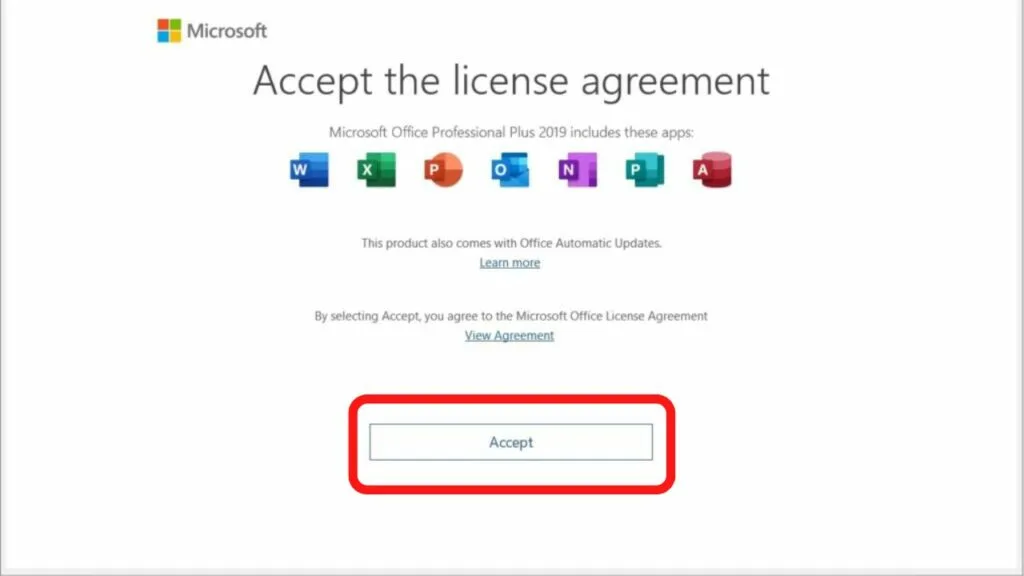
Click accept and then select your default settings for Office products.
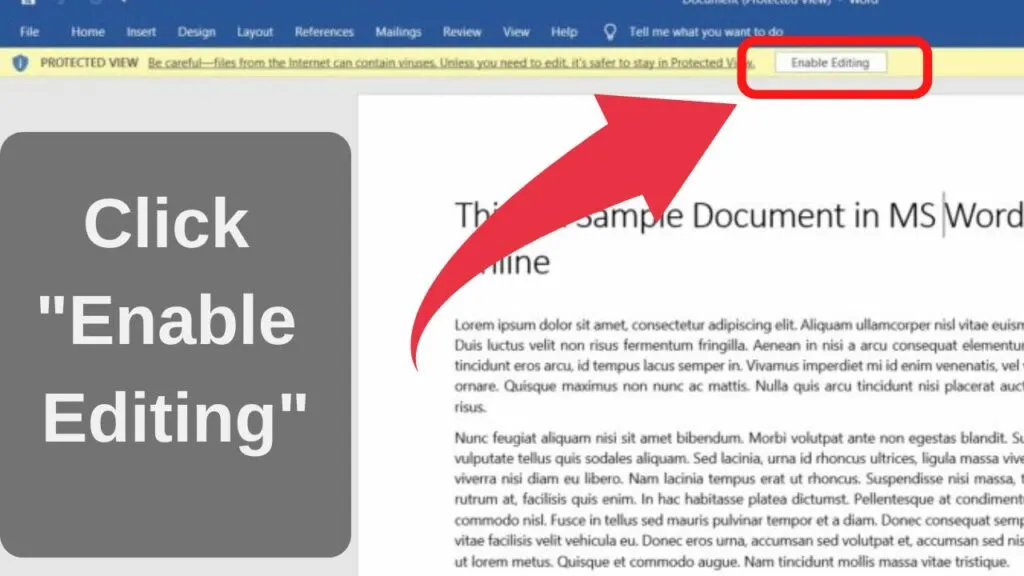
Step 5: Click on “Enable Editing”
Once your document is opened in the Word app, the default is to open in protected view. This is a read-only file until you click on the “enable editing” button at the top of the page.
Step 6: Open the “Save as” options
The Word app has more file types that can be saved. To access the save options in the Word app, go to “File”, then select “Save as”.
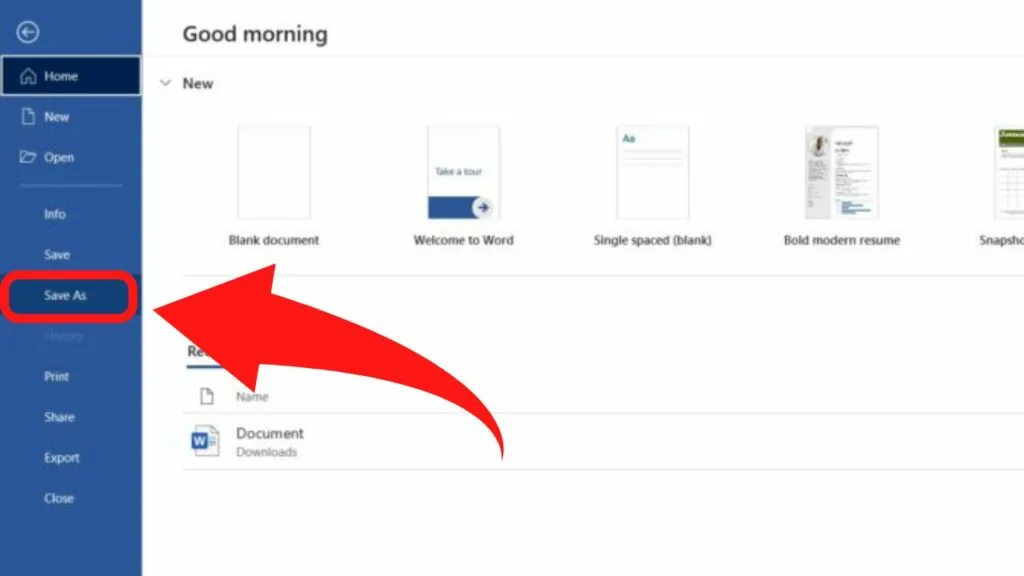
Step 7: Select a folder, then Save as “Web Page,” or “WebPage Filtered”
The save as options only show once you select a destination folder to save your file in. Select the folder, or save to desktop, then select the file type.
The two options that save Word as HTML are saving as a Webpage, or Webpage, Filtered.
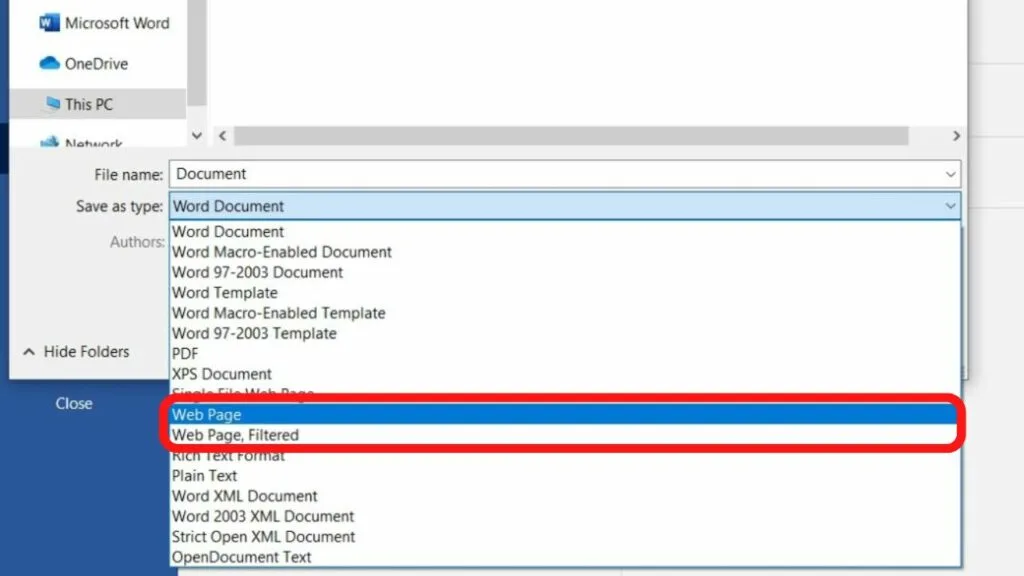
Selecting the Save As Webpage, Filtered option it will strip out some of the word specific tags, but not them all. That is because MS Word uses HTML and XML formats.
Saving as Webpage, Filtered file will show a prompt before saving the file alerting you that the saving as this file type will remove Office-specific tags. Select “Yes” to continue and save the file.
Step 8: Open the Word HTML file in your browser
Saving as a Webpage, or Webpage filtered in Word will save the file as a *.htm file. These will open with your systems default browser.
How to Edit the HTML of a Word Document
Step 1: Open the HTML file in a plain text editor
Open the folder that has your HTML file saved in it and right-click to access the context menu.
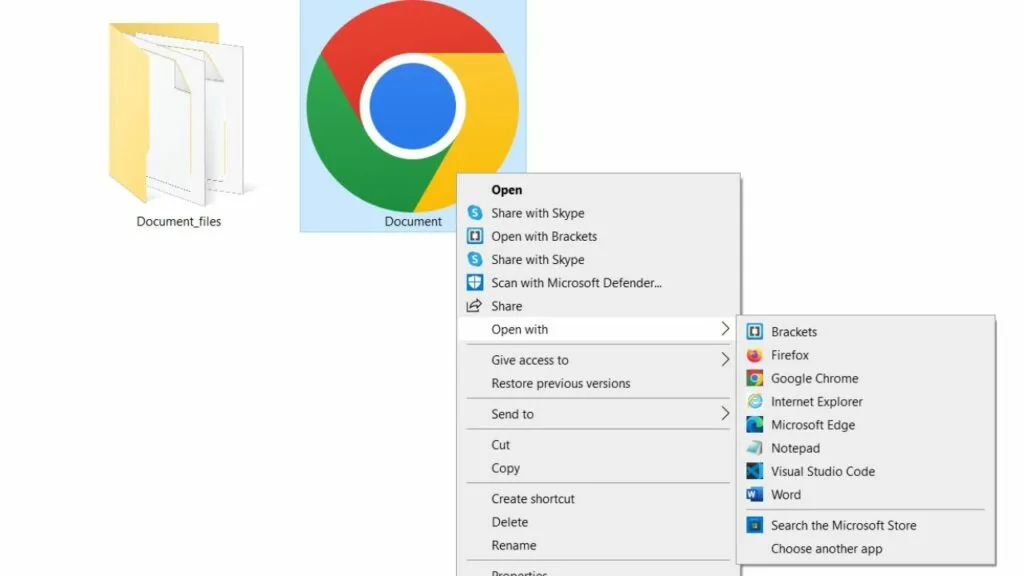
Step 2: Open with a plain text editor or source code editor
Notepad is a plain text editor installed on most Windows machines. The HTML of any document can be edited by either a plain text editor or a source code editor, such as Brackets or Visual Studio Code.
It is not possible to mark up a document with HTML within Word.
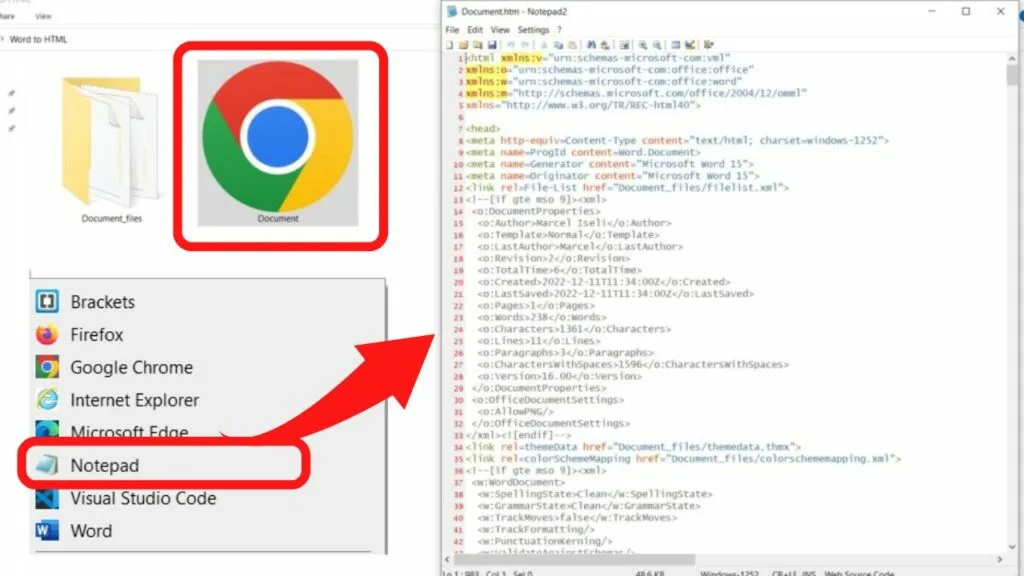
Once the file is opened in a plain text or source code editor, you will see all of the source code the document is marked up with.
You can start to clean the code here, and customize the document by adding your own HTML.
The Difference between a Word “Web Page” and “Webpage, Filtered”
When saving the file type as a Webpage, there are two options. Webpage and Webpage, Filtered. Both file types are saved with the *.htm file extension.
Neither method produces clean HTML code. Both contain Microsoft specific tags in HTML and XML.
- HTML stands for HyperText Markup Language
- XML stands for eXtensible Markup Language
Both Word Webpage options contain both HTML and XML languages. The difference with the Webpage Filtered is that Office specific tags are removed via the filter option. It produces less of a mess in the code, but it is ready to publish online.
For web publishing, a *.htm file can be uploaded to the server and viewed on a website, although many of the styles are likely to be stripped out because styling in Word uses Microsoft Specific tags.
What you see in the app is rarely what will show in a browser.

