Working with HTML is great for structuring web pages, but without knowing how to add CSS to HTML, you will have a bare font typeface with zero styling applied.
CSS and HTML go together like hot chocolate and marshmallows. They can work great on their own but are much better together.
CSS has to be applied to HTML documents for styling various properties. The fonts, the heading tags, the colors, the size of typography, line spacing, and any padding elements to wrap around images.
Everything that has to do with how HTML pages are styled is done with CSS.
How to Add CSS to HTML
There are three ways to add CSS to HTML pages. Use internal CSS in the head section using the HTML style tag, use the link attribute to link to an external style sheet, or apply inline CSS within the body section of an HTML document.
How to Add Inline CSS to HTML

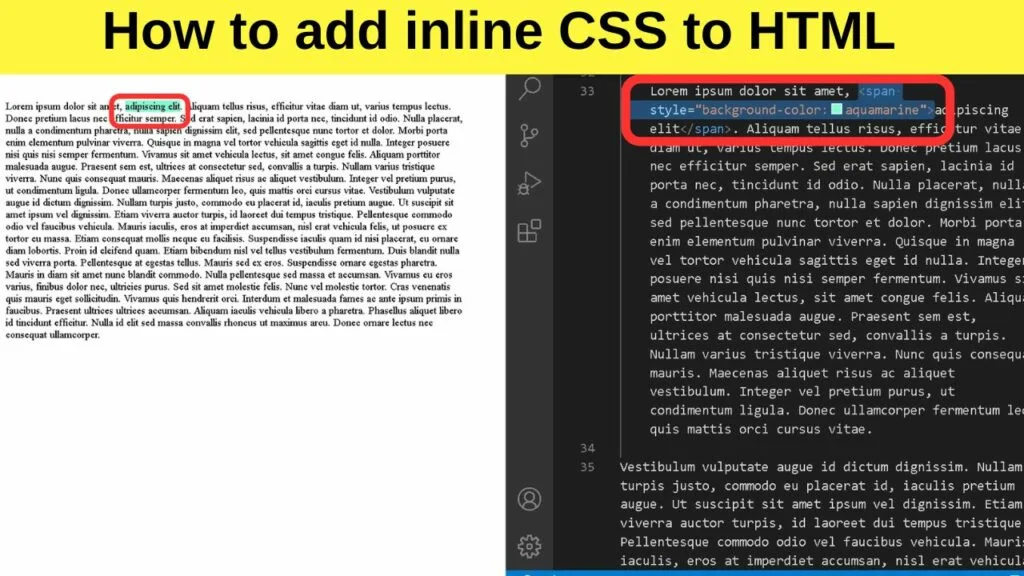
Inline CSS is added within a section of a page. The CSS is added between an opening span tag and a closing span tag in HTML.
Something to note is that inline CSS will override both internal and external CSS rules. It is for that reason that it is handy to know how to add CSS inline. It takes precedence over all other methods.
This method makes it a breeze to change the style of a single element without affecting every web page on a website.
To add CSS inline, use the span tag within a section of the HTML document. The span element is an inline container.
An example of inline CSS:
|
1 2 3 |
<body> <p>This is a <span style="background-color:aquamarine">sentence</span>.</p> |
To keep the markup clean and webpages as bloat-free as possible, this method should be limited to only when you need to make small style changes to a document – or if you are working with a single HTML page.
It is not worth the effort to create a separate stylesheet for a single web page.
How to Add Internal CSS to HTML

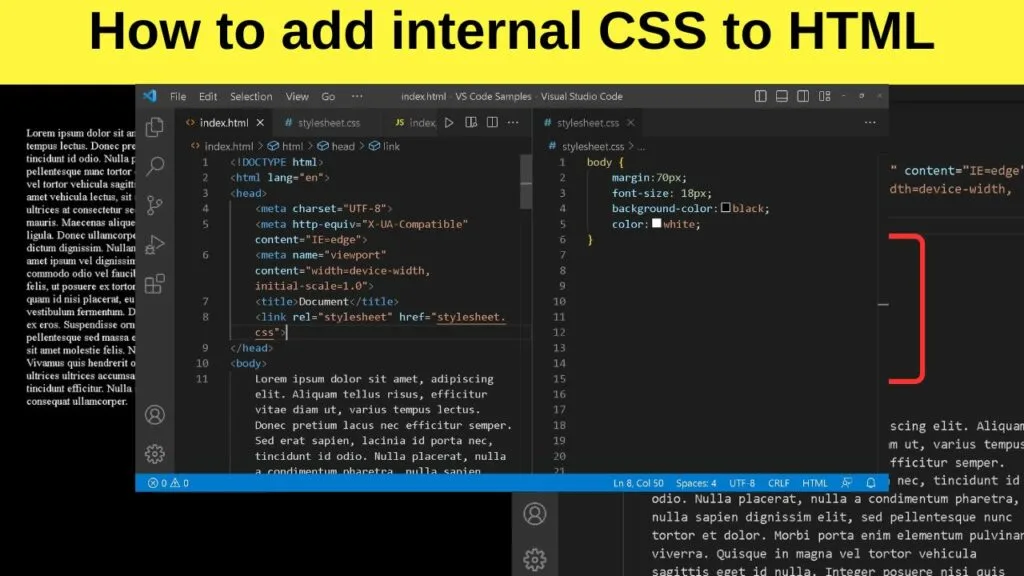
Internal CSS is added to the head section of HTML web pages using style tags.
The code below is an example of how the font size for the body element is set using internal CSS.
|
1 2 3 4 5 |
<style> Body { Font-size:15px; } </style> |
When using this method, the HTML style tag is placed between the opening and closing HTML head tags.
The code below is an example of what the HTML document would look like with the CSS applied.
|
1 2 3 4 5 6 7 8 9 10 11 12 13 14 |
<head> <meta charset="UTF-8"> <meta http-equiv="X-UA-Compatible" content="IE=edge"> <meta name="viewport" content="width=device-width, initial-scale=1.0"> <title>Document</title> <style> Body { Font-size:15px; } </style> </head> <body> </body> </html> |
This method is preferred over inline CSS as it is easier to manage, edit, and make changes on the fly. The downside to using internal CSS is that it needs to be applied to every web page.
The simplest way to add CSS to HTML websites with multiple pages is to work with an external CSS stylesheet.
How to Add External CSS to HTML

For the majority of websites, working with an external stylesheet for CSS is beneficial for multiple reasons.
Mainly, one file controls the presentation aspects of every single page on the website. And since it is a single file, browsers can cache it making it load faster on the next page load.
The knock-on effect of that is lower bandwidth consumption.
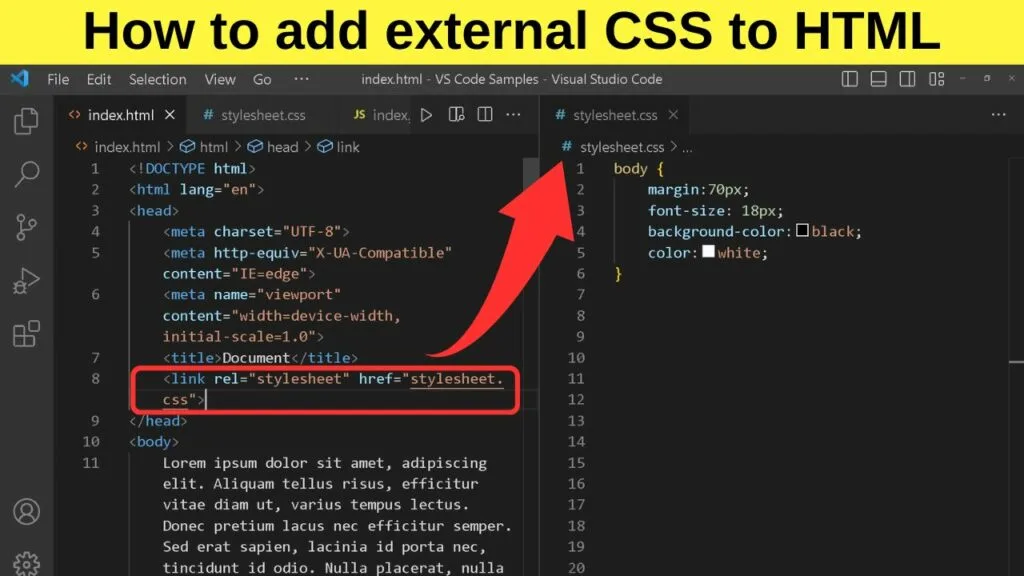
External CSS is applied to the head of an HTML document using the LINK attribute.
How to Add CSS to HTML with the Link Attribute
Within the head section of the HTML document, only two references are required.
The link rel, which is the link relationship, and the href attribute which is to point browsers to the file location where the stylesheet is stored on the server.
Naturally, you need to create the file first.
When working with different languages, it is a good idea to organize your languages into separate files.
- Index.html to structure your pages
- Style.css or stylesheet.css to apply the CSS styling properties
- Index.js to run any JavaScript functions.
The importance is with the file name extensions.
- .HTML is your hypertext markup language used to style a webpage.
- .CSS is for the website’s external Cascading Style Sheet.
- .JS is for JavaScript.
The style.css file is the external style sheet.
Whereas with internal CSS, the style tag is inserted into the head section of the HTML document, you use the link attribute to link to the external style sheet in the head section.
Where you would apply the style tags to work with internal CSS, add the link attribute instead.
The snippet would look like this:
|
1 |
<link rel="stylesheet" href="stylesheet.css"> |
The link tag in HTML is self-closing. You do not need a closing link tag.
The overall head section of the HTML document would be similar to the code snippet below…
|
1 2 3 4 5 6 7 8 |
<head> <meta charset="UTF-8"> <meta http-equiv="X-UA-Compatible" content="IE=edge"> <meta name="viewport" content="width=device-width, initial-scale=1.0"> <title>Document</title> <link rel="stylesheet" href="stylesheet.css"> </head> <body> |
With this method, changes to the stylesheet can make site-wide changes. You can still make changes to individual pages (and sections of them) using inline CSS as that overrides page-level CSS rules and the external stylesheet.
How to Manipulate CSS with JavaScript

JavaScript is handy for adding interactive elements to web pages. You can use JavaScript to give users options for how they want to style the web page by making changes to the CSS properties with JavaScript.
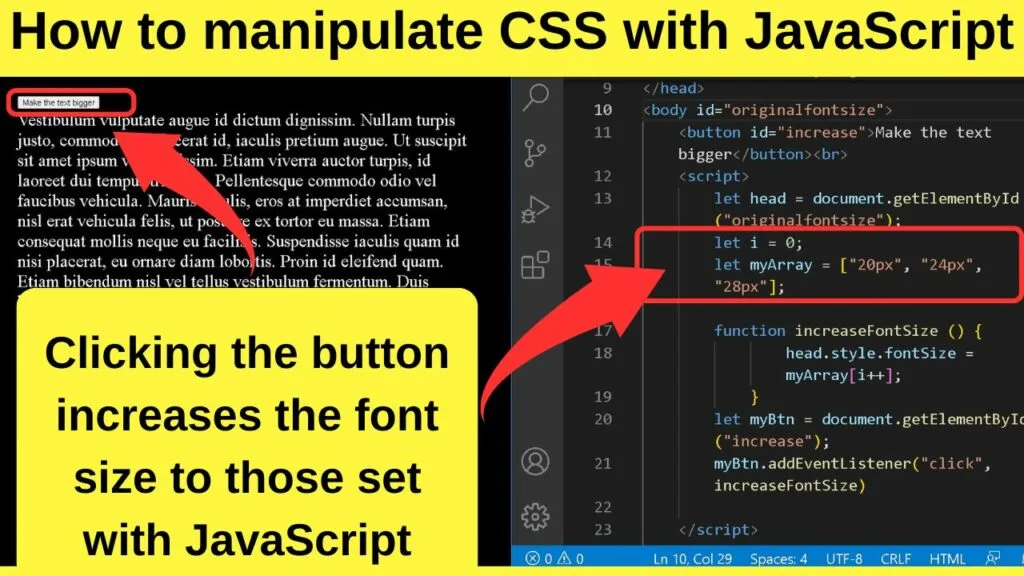
As an example, add a clickable button to increase the font size, change the text color, or apply a different background color to the page for easier reading.
How to Add a Clickable Button to Change CSS with Javascript
To change all of the text sizes, assign an id attribute to the body element.
|
1 |
<body id="originalfontsize"> |
Then add the button tag with an ID that will be used to find and run the script.
|
1 |
<button id="increase">Make the text bigger</button><br> |
Then insert the JavaScript
|
1 2 3 4 5 6 7 8 9 10 11 12 |
<script> let head = document.getElementById("originalfontsize"); let i = 0; let myArray = ["20px", "24px", "28px"]; function increaseFontSize () { head.style.fontSize = myArray[i++]; } let myBtn = document.getElementById("increase"); myBtn.addEventListener("click", increaseFontSize) </script> |
Once that is done, load the page and the button becomes clickable. The original font size is set in the external style sheet, or in the head section of the document. On each click, the font size will increase by the values set as the Array.
In the example above, it will increase the font size for the whole page because the id is set for the body.
You can set the Id name to any section, such as to only change the CSS values for a specific section of a page.

