Are you tired of the default borders that come with HTML tables? Do you want to create a sleek, borderless design for your website? In this blog post, we’ll explore different methods you can use to remove borders from HTML tables completely.
From CSS styles to HTML attributes, we’ll cover everything you need to know to achieve a borderless look for your tables. So, let’s dive in and learn how to remove borders from HTML tables!
How To Remove Borders from HTML Tables
You can use CSS, specifically the “border-collapse” and “border-spacing” properties to remove borders from HTML tables. Another method is to use Bootstrap CSS and apply the “noBorder” class to your table.
Understanding the Problem With Table Borders
Before we dive into the solutions for removing borders from HTML tables, we must first understand the problem we’re trying to solve. We will use two scenarios.
- A table with text data
- A table with images
A Table with text data
Take a look at the HTML code below, which displays student information.
|
1 2 3 4 5 6 7 8 9 10 11 12 13 14 15 16 17 18 19 20 21 22 23 24 25 26 27 28 29 30 31 |
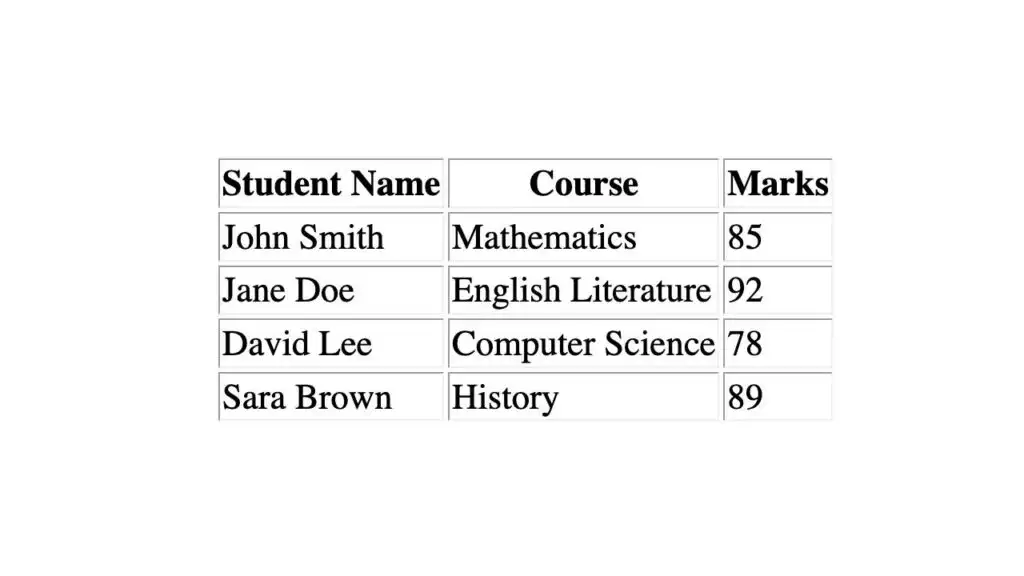
<table border="1px"> <thead> <tr> <th>Student Name</th> <th>Course</th> <th>Marks</th> </tr> </thead> <tbody> <tr> <td>John Smith</td> <td>Mathematics</td> <td>85</td> </tr> <tr> <td>Jane Doe</td> <td>English Literature</td> <td>92</td> </tr> <tr> <td>David Lee</td> <td>Computer Science</td> <td>78</td> </tr> <tr> <td>Sara Brown</td> <td>History</td> <td>89</td> </tr> </tbody> </table> |
When you open this code on your browser, you will see an output similar to the image below.
[IMAGE: How To Remove Borders from HTML Tables Text Data]
This table has an added “outer” border, making the information look cluttered. This is the border we will show you how to remove in this tutorial
A table with Images
Take a look at the HTML code below.
|
1 2 3 4 5 6 7 8 9 10 11 12 13 |
<table class="container"> <tr> <td class="header" colspan="3"></td> </tr> <tr> <td class="left"></td> <td class="content"></td> <td class="right"></td> </tr> <tr> <td class="footer" colspan="3"></td> </tr> </table> |
The HTML code above creates a table with a class name “container.” This table has three rows, where the first and last rows are empty and used to create a header and a footer, respectively.
The second row has three columns; the left and right columns each have a unique background color, while the middle column is empty.
Tip: In this post, we have used colors instead of images so that you can clearly understand the sample screenshots used in this tutorial.
Now, let’s look at the CSS code.
|
1 2 3 4 5 6 7 8 9 10 11 12 13 14 15 16 17 18 19 20 21 22 23 24 25 26 27 28 29 30 31 32 33 |
.container { width: 800px; height: 400px; } .header { width: 100%; height: 100px; background-color: indigo; } .left { width: 25%; height: 200px; background-color: blue; } .content { width: 50%; height: 200px; } .right { width: 25%; height: 200px; background-color: brown; } .footer { width: 100%; height: 100px; background-color: green; } |
Here’s what each section of the code does:
- The .container class sets the width and height of the table to 800 pixels and 400 pixels, respectively.
- The .header class sets the width of the table header to 100% and the height to 100 pixels. It also sets a background color for the header using the background-color property.
- The .left class sets the width of the left column to 25% and the height to 200 pixels. It also uses the background-color property to set a background color for the left column.
- The .content class sets the width of the content column to 50% and the height to 200 pixels.
- The .right class sets the width of the right column to 25% and the height to 200 pixels. It also uses the background-color property to set a background color for the right column.
- The .footer class sets the width of the table footer to 100% and the height to 100 pixels. It also sets a background color for the footer using the background-color property.
Together, these CSS classes define the layout and appearance of the HTML table, including the sizes of the columns and the heights of the header and footer.
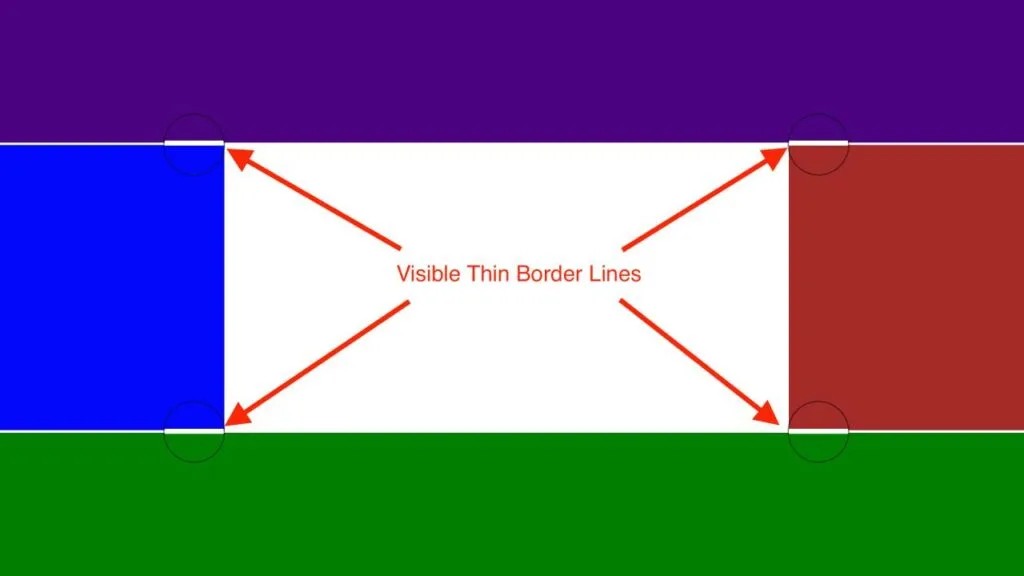
When you open this code in the browser, you will see an output similar to the image below.
[IMAGE: How To Remove Borders from HTML Tables image Data]

From the image above, you can see thin white lines/ spaces between the rows. How can we get rid of these borders/ white spaces?
Method 1: Remove Borders from HTML Tables Using CSS
To remove all borders from a table, we can use the border-collapse property. border-collapse is a CSS property that controls whether adjacent table cells should have shared or separate borders. The default value for border-collapse is separate, which means that adjacent table cells will have separate borders.
When border-collapse is set to collapse, adjacent table cells share borders, resulting in a more compact and uniform appearance. This property can be applied to the table element or to individual cells (th and td).
To remove all borders from a table, the border-collapse property can be set to collapse, and the border-spacing property can be set to 0.
|
1 2 |
table { border-collapse: collapse; border-spacing: 0;} |
Alternatively, you can also reset the padding and spacing properties of the table elements to zero, to ensure that no unwanted space or padding is present around the table or its cells.
|
1 2 3 4 5 6 7 8 9 10 |
table, thead, tbody, tfoot, tr, th, td { padding: 0; border-spacing: 0; } |
When you apply any of the two styles above, you will get a table that has no borders between the row or columns. See the image below.
[IMAGE: How To Remove Borders from HTML Tables Method 1]

If you have a table with text data, you can set the margin property to auto and the border property to none as shown below.
|
1 2 3 4 |
table{ margin: auto; border: none; } |
This will remove the outer border in your table. You will see an output similar to the image below.
[IMAGE: How To Remove Borders from HTML Tables Text Data method 1]

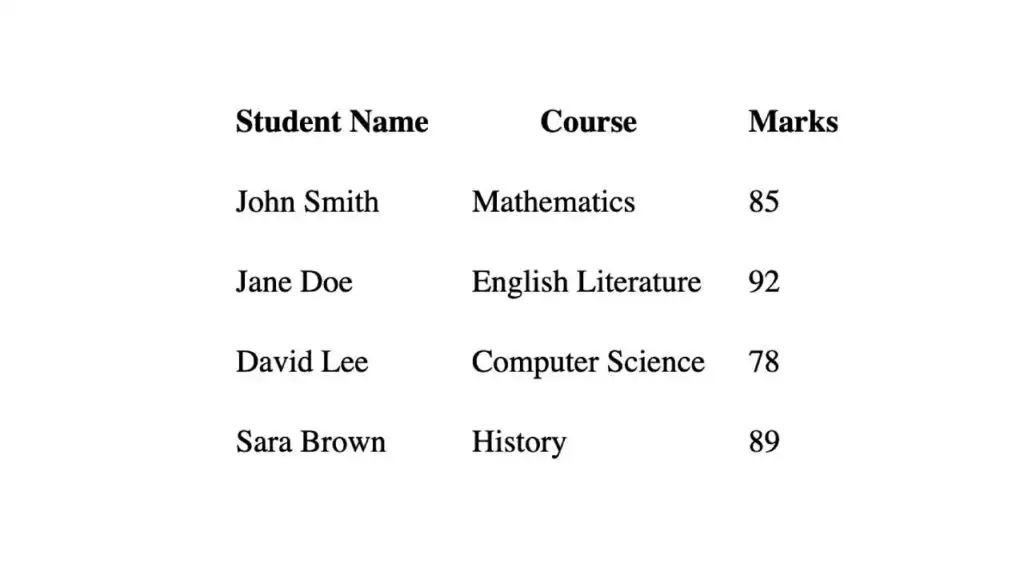
Alternatively, you can completely remove the borders by setting the margin property to auto and the border property to none for the table, table row, table data and table header. See the CSS code below.
|
1 2 3 4 5 |
table, tr, td, th{ padding: 10px; margin: auto; border: none; } |
This will give you an output similar to the image below.
[IMAGE: How To Remove Borders from HTML Tables Text Data method 2]

Method 2. Remove Borders from HTML Tables Using Using !important Rule in CSS
The !important keyword is used in CSS to give priority to a particular rule and override any conflicting styles applied to an element. While it can be a useful tool in certain situations, it should be used with caution to avoid unexpected side effects.
To remove table borders using the !important rule, you can apply it to the border and border-spacing properties of the table, tr, td, and th elements. Here’s an example:
|
1 2 3 4 |
td, th, tr, table { border: 0 !important; border-spacing: 0 !important; } |
This will remove all borders and spacing between table cells. However, it’s important to note that using !important can make it harder to override the styles later on, especially when working with larger CSS files.

Note: Use !important sparingly and only when necessary. Instead, try to write specific and targeted CSS rules that don’t rely on the !important keyword to achieve the desired effect.
Method 3. Remove Borders from HTML Tables Using Inline Styles
Inline styles are CSS styles that are applied directly to HTML elements using the style attribute. They have the highest specificity, which means that they override all other styles.
To remove borders from a table using inline styles, you can add the border attribute to the table element and set it to 0. You can also set the cellpadding, and cellspacing attributes to 0 to remove any padding and spacing between cells.
Here’s an example:
|
1 2 3 4 5 6 7 8 9 10 11 12 13 |
<table class="container" cellspacing="0" cellpadding="0"> <tr> <td class="header" colspan="3"></td> </tr> <tr> <td class="left"></td> <td class="content"></td> <td class="right"></td> </tr> <tr> <td class="footer" colspan="3"></td> </tr> </table> |
One advantage of using inline styles is that they can be applied to individual elements, which gives you more control over the styling of your table.

Tip: Excessive use of inline styles can make your HTML code more cluttered and harder to maintain. It’s generally recommended to use external or internal stylesheets instead of inline styles for larger projects.
Method 4. Remove Borders from HTML Tables Using Bootstrap CSS
Bootstrap is a popular front-end framework that provides a collection of pre-built CSS and JavaScript components to help you quickly and easily create responsive websites.
To get started using Bootstrap, you can include the Bootstrap CSS and JavaScript files in your HTML code using the Bootstrap CDN. Once done, you can use the “noBorder” class to remove table borders in Bootstrap.
Here’s an example of how to use the “noBorder” class in your HTML code:
|
1 2 3 4 5 6 7 8 9 10 11 12 13 |
<table class="container noBorder"> <tr> <td class="header" colspan="3"></td> </tr> <tr> <td class="left"></td> <td class="content"></td> <td class="right"></td> </tr> <tr> <td class="footer" colspan="3"></td> </tr> </table> |
When we use the bootstrap noBorder class in our code, we get a good-looking table without borders as shown in the image below.

It’s important to note that while Bootstrap can make it easier to style your HTML tables, it’s important to use it effectively and not rely too heavily on its pre-built classes. It’s also a good practice to override any default styles you don’t need to avoid unnecessary bloat in your code.
Frequently Asked Questions About How To Remove Borders from HTML Tables
What is the difference between border:none and border-collapse?
border:none removes any border from an element, whereas border-collapse sets the table’s borders to collapse into a single border, creating a more streamlined look.
So, border:none is typically used when you want to completely remove any borders from an element, whereas border-collapse is used when you want to have borders around your table cells, but you want to collapse them to create a more streamlined appearance.
Can You Remove Table Borders With jQuery?
Yes, you can remove table borders using jQuery by manipulating the CSS properties of the table element.
|
1 2 3 4 5 6 7 8 9 10 11 12 13 14 15 |
<script> $(document).ready(function() { // Select the table element by its ID var table = $('#my-table'); // Remove the border attribute from the table table.removeAttr('border'); // Set the CSS properties to remove table borders table.css({ 'border-collapse': 'collapse', 'border-spacing': '0' }); }); </script> |
In the above code snippet, we first select the table element by its ID using the jQuery selector $(‘#my-table’). Then, we remove the border attribute from the table using the removeAttr() method.
Finally, we set the CSS properties border-collapse and border-spacing to collapse and 0, respectively, using the css() method to remove the table borders.

